This is part 4 of the vCenter 6.7 High Availability setup series. If you haven’t already, go check out vCenter 6.7 HA Setup - Part 1 to get an introduction and see some of the requirements.
In this post, I’m going to cover the various actions that take place when you have vCHA configured, including:
- Enable vCenter HA
- Maintenance Mode
- Disable vCenter HA
- Initiate Failover (manual)
- Failover from losing the Active node
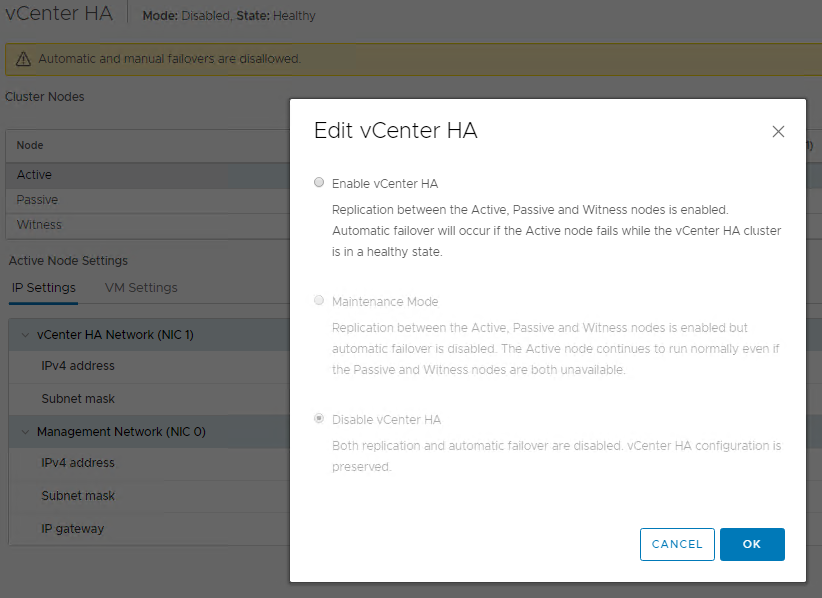
From the HA configuration page, if you click on EDIT, you will get a message showing various options. Assuming your HA is Enabled\Healthy, you should see “Enable vCenter HA” as being greyed out.
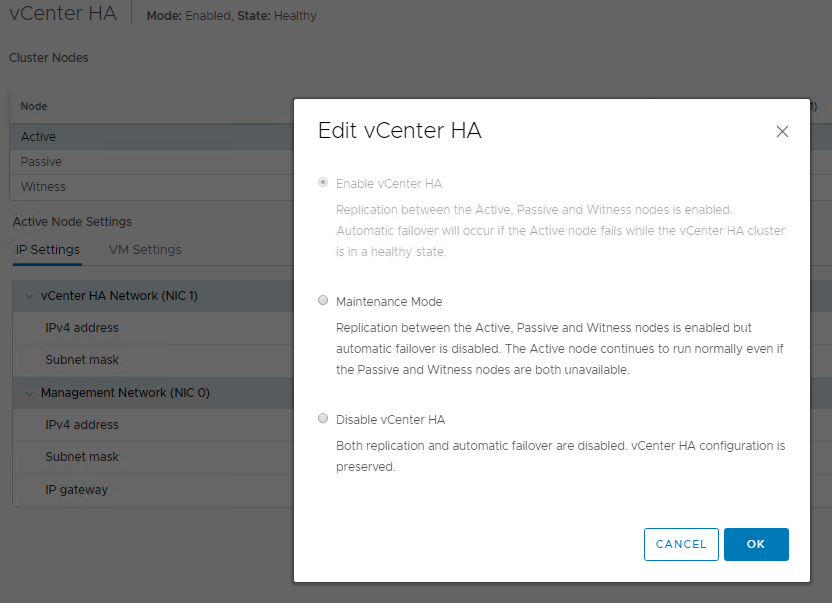
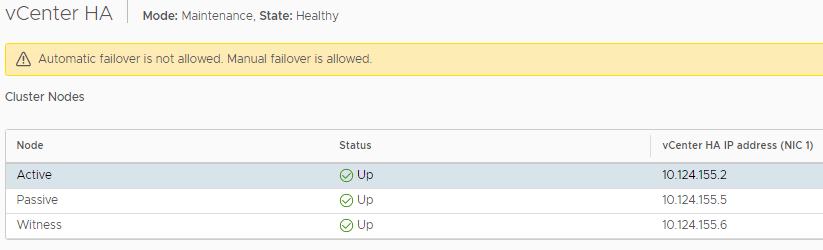
If you click on Maintenance Mode, you will be placing the HA cluster into a Maintenance\Healthy state. You can still perform a manual failover, but Automatic failovers will not happen. This is very useful when you need to perform various maintenance tasks on the vCenter appliances such as critical updates.
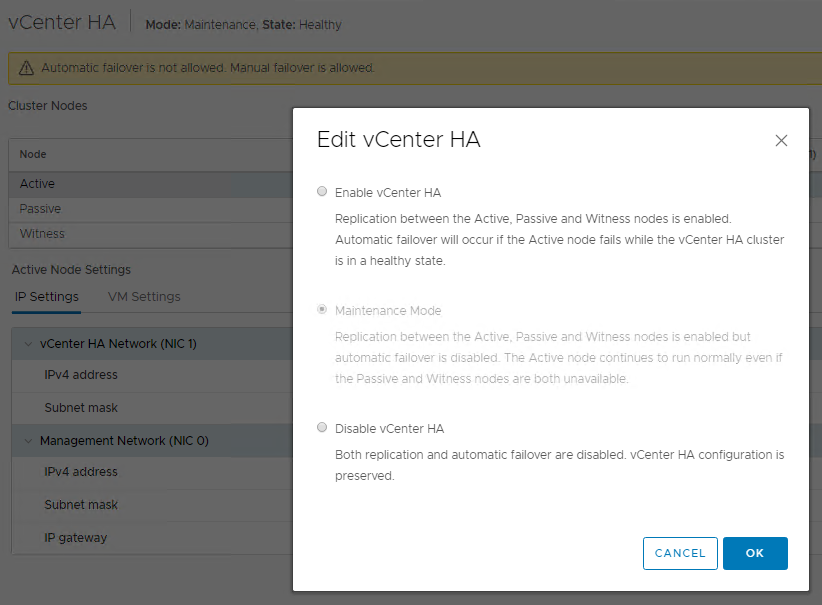
Whenever are we done with our maintenance, we can go back into EDIT, and we are now able to select “Enable vCenter HA”.
If you click on Disable vCenter HA, you are doing exactly what it says and placing the HA cluster into a Disabled\Healthy state. You would NOT be able to perform a manual failover, and Automatic failovers would not be allowed either. This is a setting that I would only use if I am making a sizing change in the vCSA (Small, Medium, Large, X-Large) or some other major change and wanted to destroy and recreate the HA cluster.
Assuming you didn’t destroy the HA and recreate it, you would need to come out of a Disabled\Healthy state. You would do this by selecting “Enable vCenter HA”, as that would be your only available option.
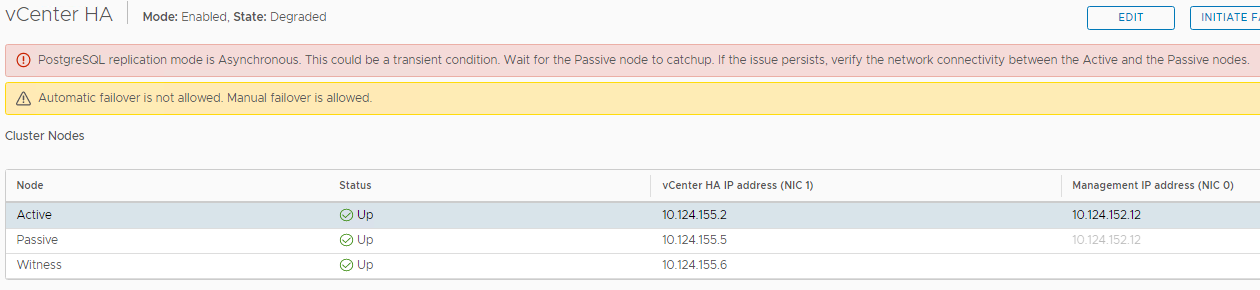
Before the HA cluster can get back into an Enabled\Healthy state, we must wait for the PostgreSQL DB replication to catch up and be fully synchronized. The longer vCHA was disabled, the longer it will take to catch up (depending on the number of DB changes). You might see a message like this one while we are waiting for the data to be synchronized.
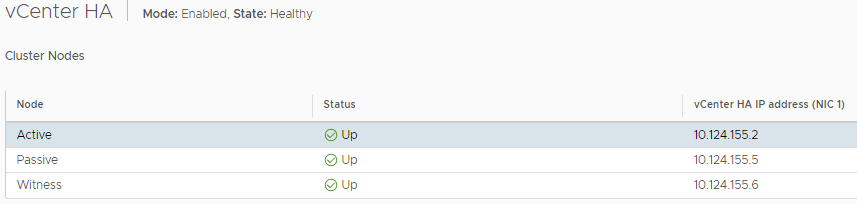
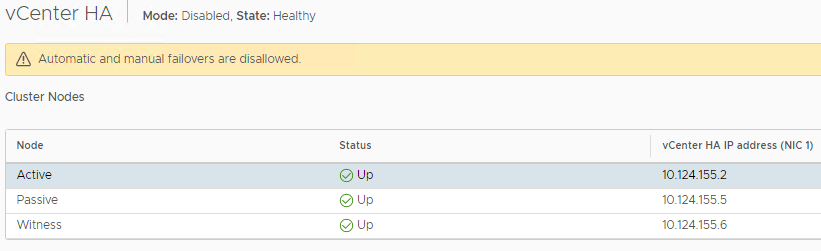
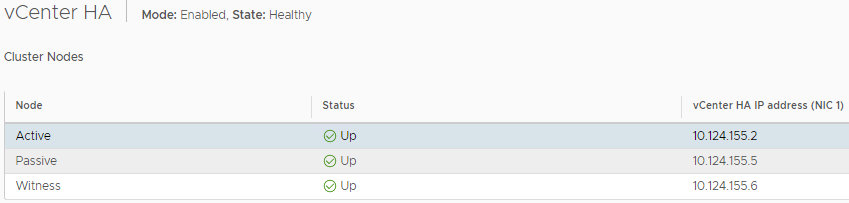
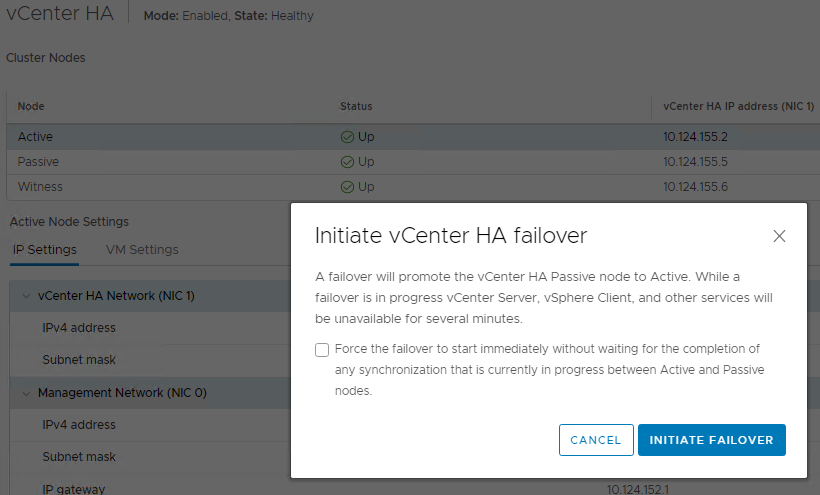
At this point, we see 10.124.155.2 as the Active cluster node in an Enabled\Healthy Cluster. Keep this in the back of your mind as we proceed with the various vCHA failover options.
We can initiate a manual failvoer by clicking on Initiate Failover and click Initiate Failover.
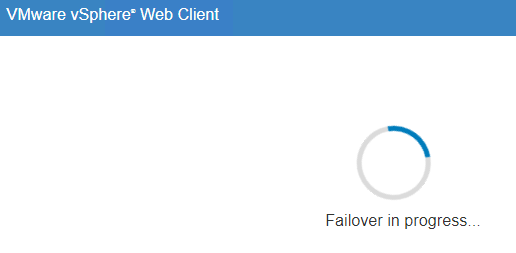
Once the process begins, your page will automatically switch from the Active –> Passive apppliance and you will see the “Failover in progress” screen.
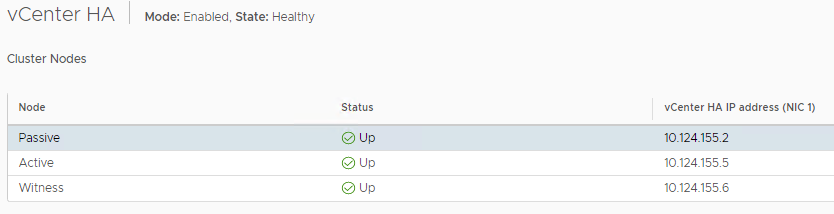
After the failover has completed, you will now notice that 10.124.155.2 is now the Passive node and 10.124.155.5 is Active. The entire process for the Manual & Automatic took almost 10 minutes from the time that I clicked Initiate Failover. The Automatic failover (killing the Active node) was about 30 seconds faster because there is no DB synchronization that needs to happen.
The same process happens when you lose the Active node from an ESXi Host failure or some other event that causes the Witness to initiate an Automatic failover event. When the Passive node has taken over and the vCHA cluster is Enabled\Degraded, you will see a few messages identifying the issues. The first line let’s you know that the vCHA Cluster has lost a node with IP Address XXX. The second line it merely letting you know that the PostgreSQL is not being replicated because the Passive node is not reachable. The last line is telling you that the vCenter configuration is not being replicated.
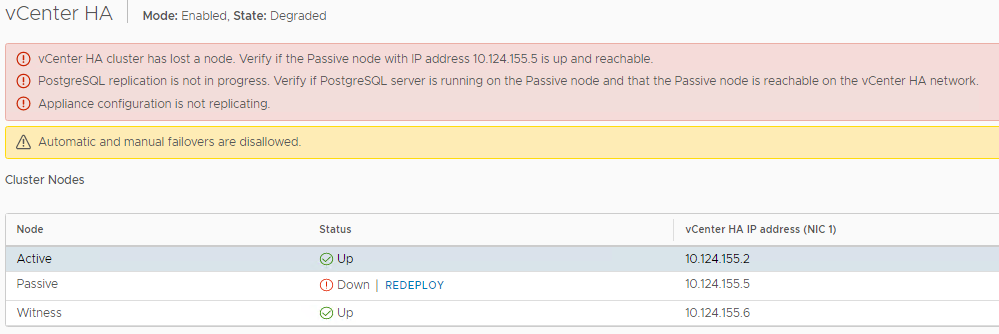
Assuming your Computer cluster has HA enabled and the crashed node went offline due to an ESXi Host issue, it will be restarted on another ESXi Host automatically. If the issue is with the crashed node is not fixable or simply doesn’t make sense to fix due to SLAs, you will notice in the above picture the option to REDEPLOY next to the Passive node. If you go thru the redeploy process, you will enter a few configurations and vCHA will clone the Active node and create a new Passive node. Either option you choose, your vCHA should look like this when completed. The crashed node becomes the Passive node and does NOT automatically take over the Active duties.